

How I automated a tedious task in an hour using JavaScript and JIMP!
Could've done it in 30 minutes manually


Photo by Dominik Scythe on Unsplash
Table of contents

No headings in the article.
My primary job at SRMKZILLA, other than making memes, is to generate certificates once every few months. We have a very neat little discord bot JACK that does that, where you enter the certificate template in a database and run a very simple command, and et voila, people who have their names in the database (the participants) can enter their emails in a text channel and our cute little bot, JACK, will send them their certificate. This works flawlessly but over time we realized that not everyone is... how do I say this politely... tech savvy enough to use discord.
People found it difficult to get their certificates and in some instances we had to manually write their names over our certificate template and send them that, which rendered the entire process moot. So I did what I do best, I wrote a simple script that takes in the certificate template and based on the specifications generates as many certificates as you want.
Let's start with a sample template:

Half of the work is done once you have a template like this in an image format (jpg or png). Thanks to the amazing editorial domain, I need not worry about this 😉.
Now, let's get started with the coding part (you can find the entire code here).
First, initialize a new project and install the dependencies (use pnpm and instantly become 20% faster and 100% cooler):
npm init -y
npm i jimp slugify
We are using Jimp for image manipulation and slugify to make sure the file names do not have unusual casing or spaces and are uniform hence easier to search alphabetically. Additionally, we'll be using the fs module(No need to install this, it is a core module) to save the images to the file system.
Now our next step is to create an index.js file and import the required modules:
const jimp = require("jimp");

const fs = require("fs");

const slugify = require("slugify");
Before moving ahead, let's create another file called people.js where we'll store the participant data.
module.exports.participants = [
  {
    name: "Michael Scott",
  },
];
Here we have created an array of objects where each object contains the name of the participant. An array of objects is preferable over an array of names because we might need additional data like the date in certain cases. In addition to this, most of the participant data we get is in the csv format and csv files can be easily converted to an array of objects.
Let's come back to index.js and import this there:
const jimp = require("jimp");

const fs = require("fs");

const slugify = require("slugify");

const { participants } = require("./people");
Now, we'll create a main function and call it, this function will contain the necessary logic to print certificates:
const jimp = require("jimp");

const fs = require("fs");

const slugify = require("slugify");

const { participants } = require("./people");

const main = async () => {

};

main();
Why did I make the main function asynchronous?
In Jimp, when you load a font, it returns a promise, hence we must wait for it to return, therefore the need for async and await. Alternatively, you could use .then but it makes the code unreadable after a certain extent.
Next up, we add a for loop to iterate over the participants (I am using the raw for syntax, one could use forEach or map but that requires the usage of Promise.all because of the promises):
const jimp = require("jimp");

const fs = require("fs");

const slugify = require("slugify");

const { participants } = require("./people");

const main = async () => {
  for (let i = 0; i < participants.length; i++) {

  }
};

main();
Next up, we log some data to the console, set a timeout (this ensures there is a small break between printing of all certificates to make sure I don't burn my system, and it looks cool as hell), read the image from the file system, and load the font:
const jimp = require("jimp");

const fs = require("fs");

const slugify = require("slugify");

const { participants } = require("./people");

const main = async () => {
  for (let i = 0; i < participants.length; i++) {
    const ele = participants[i];
    console.log(i, " : ", ele.name);

    setTimeout(function timer() {}, 2000);

    let imgObject = await jimp.read("thank-you-figma-community.png");

    const fontLoaded = await jimp.loadFont("./font3/font1.fnt");
  }
};

main();
Our ./font folder contains the data necessary to load the font. It looks something like this:
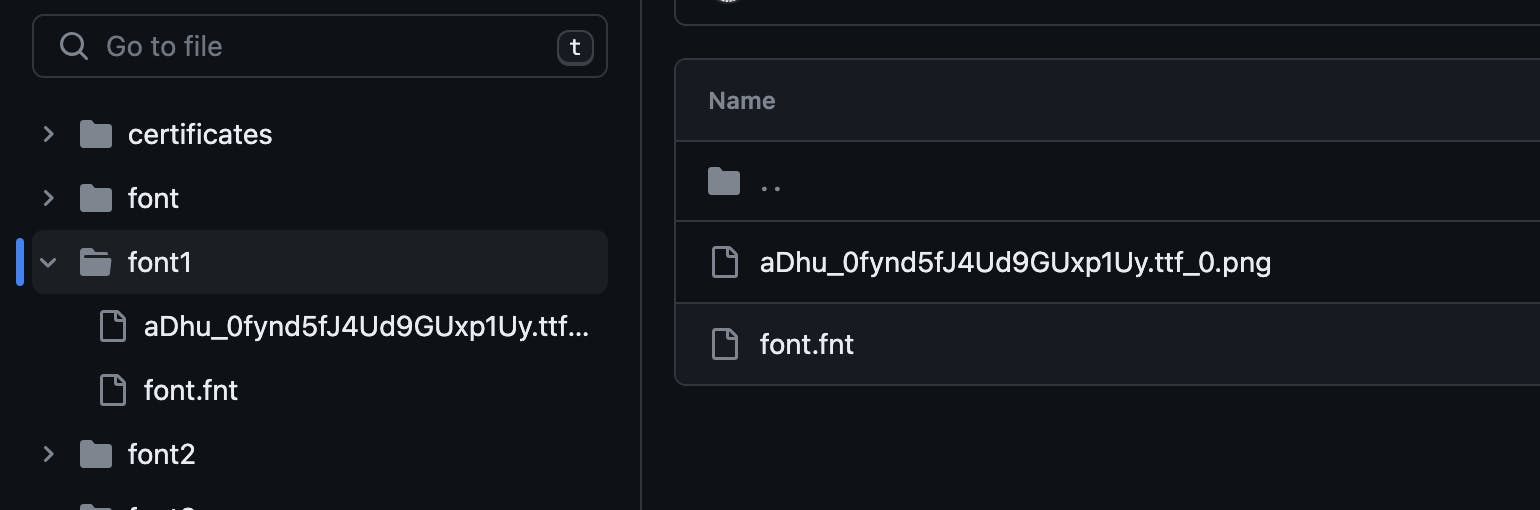
In my case, I have used the popping font. To use the font, go to google fonts, find the font you want, download it and unzip it.
If you wish to simplify the process, you can use the built-in fonts and just import JIMP and use the fonts like this:

Once unzipped, you'll notice that it is in the ttf format and we need to convert it to the fnt format. We can easily do it by using ttf2fnt . Now, the size and color selection is more of a trial and error case, so you might have to do that a few times to find out which one suits your certificate template the best.
Next up, we copy the downloaded font to a folder in our working directory (where index.js is) and save the folder as font. You'll notice that the .fnt file has a unique name, make sure you copy it and use that in your code, else things might break.
Now, that are done with the fonts, let's print the actual certificate and save it to our file system (in a folder called certificates):
const jimp = require("jimp");

const fs = require("fs");

const slugify = require("slugify");

const { participants } = require("./people");

const main = async () => {
  for (let i = 0; i < participants.length; i++) {
    const ele = participants[i];
    console.log(i, " : ", ele.name);

    setTimeout(function timer() {}, 2000);

    let imgObject = await jimp.read("thank-you-figma-community.png");

    const fontLoaded = await jimp.loadFont("./font3/font1.fnt");
    imgObject = await imgObject.print(
        fontLoaded,
        0,
        590,
        {
          text: ele.name,
          alignmentX: jimp.HORIZONTAL_ALIGN_CENTER,
          alignmentY: jimp.VERTICAL_ALIGN_CENTER,
        },
        1600,
        155
      );

      imgObject.write(
        "./certificates/" +
          slugify(ele.name, {
            replacement: "_",
            lower: true,
            trim: true,
          }) +
          ".png"
      );
  }
};

main();
Now there are 4 different numbers and you might have to play with them to find the sweet spot. The first 0 represents the starting x coordinate, 590 represents the y coordinate, 1600 and 155 represent the max horizontal and vertical width. You can find more detailed documentation here.
The write part is pretty self-explanatory where we save the file in the certificates folder with the name slugified and .png as the file extension.
If everything goes right, you'll see your certificates folder populated with images like this:
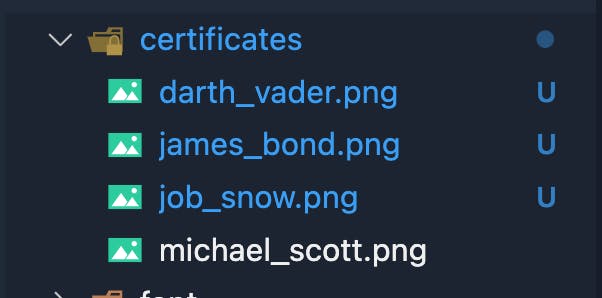
And boom, we have successfully automated the tedius task. Alternatively, you could use something like Scribe to do this in figma itself, but it has certain restrictions and is a paid tool.
You can find the entire codebase on GitHub, this was a result of some quick scripting so any changes are more than welcome. Some of the next steps that come to my mind would be to include a function to upload these to google drive or some other storage solution. Sending the certificates via mail can be a great addition to this as well.
Made with 💝 and JavaScript.